Showing posts with label applique. Show all posts

Sunday, July 25, 2010

Lost & Still Not Found

Since I have never showed this project, I'm presenting it today. This was a kit I purchased a few years back and finished all the hand appliqué and stitching on it in about July of 2008. It seems now though, I have misplaced it somewhere plus I couldn't find the finished picture either. This next one shows the appliqué partially done...
I'm going to have to go digging in some boxes downstairs to see if its down there somewhere! Hmmm, maybe I'll find the other missing pillow too. Does anyone else loose stuff like I do??

Hope everyone is having a great Sunday and a wonderful summer. I don't have much to update on the stash today. The past week has been a total wash as far as getting any quilting done. It's just been too hot!

STASH REPORT for Week #29
Used this week: 0 M
Used Year to Date: 19.86M
Added this week: 0 M
Added Year to Date: 17.07M
Net used for 2010: 2.79M

Check all the stash reports on Judy's blog.

Sunday, May 16, 2010

Stash Report for this week

All of my quilting time this week has been spent on finishing more blocks for my Joseph's Coat quilt. All of the fabric I used has already been reported. The picture above is a few of my finished blocks laid out to show how they will (eventually) look when they're all joined together.

Due to the sudden arrival of warm weather here, I have been spending much of my time getting lawns done and flowerbeds ready for planting. It's hard to believe that two weeks ago, we had some major snow and now today it is 25C, flowers and trees are blooming! Both of my neighbors are already running their air conditioning units. I've enjoyed sitting outside in the evening this week working on my applique for my Joseph's Coat.

My projects to finish for the PhD Challenge are falling behind. In order to meet the number I committed to, I will need to do at least 2 this month and 2 in June. I'm not sure if that is possible but will hopefully I can find a bit more time now to work on those.

My Pink Lemonade quilt is still hanging on the design wall. How long does it take for a project to switch from being a WIP (Work In Progress) to a PhD (Project half Done) to a UFO (Un-Finished Object)?? Is there a guideline somewhere? I've also fallen behind by two whole blocks on the Hazels Diary Quilt-along. I guess I'd better get off of here and go work on something!


WEEK 20 Stash Report
Used this week: 0 M
Used Year to Date: 17.55 M
Added this week: 0 M
Added Year to Date: 12.07 M
Net used for 2010: 5.48 M

Check out how everyone else is doing with their stash busting efforts on Judy's blog.

Saturday, March 27, 2010

Catching Up

I've been working on a few things all week in an effort to catch up with some of the projects I am doing.

1. Joseph's Coat - worked every evening for 6 days to get ALL the rest of the melon shapes prepared. I'm done that part of it!! YAY!! Now I can work on the applique...

2. Caught up on "Hazel's Diary Quiltalong". I have finished Block 2 and 3 plus caught up-to-date with Block 4!! These are 6 inch finished blocks so the pieces are rather tiny and can be a bit hard to get the points all lined up and meeting. But, as my Dad used to say... "They'll never see it from the highway!"

3. Finished assembling the feathered star block that was a tutorial on Erin's blog One Piece At a Time. I had a bit of trouble with this as it seemed like some parts were either too large or too small to fit together correctly. My block will probably never lay flat...


I've played a bit with the pink & yellow quilt blocks on the wall. I'm still moving them around a little but I hope that I will soon be happy enough with the arrangement to go ahead and sew it all together.

Sunday, March 14, 2010

Sunday Stash Report & Joseph's Coat Update


Wonder if anyone missed me last week??? I was out of town helping my daughter so I missed out doing my stash report last Sunday. It's OK though, because nothing has really changed in regards to the stash in the past 2 weeks anyway! I didn't even have time to work on any hand sewing while I was away. I was so exhausted when I got home that it has taken almost all week to recover. I guess my body is telling me that I can't do the things I once could.

WEEK 10 & 11 STASH REPORT

Used this week: 0 M
Used Year to Date: 14 M
Added this week: 0 M
Added Year to Date: 7.9 M
Net used for 2010: 6.1 M

JOSEPH'S COAT UPDATE 

It seems that I was avoiding preparing more blocks for appliqué. I decided that I needed to find a simpler and more accurate way to accomplish the prep work of laying the pieces out and attaching them to the background fabric. I am just using freezer paper for the appliqués on this project so I need to remove the paper. Here is the method I have come up with that works for me.

1. Prepare the melon shapes by ironing the freezer paper shape to the wrong side of the fabric and cutting around the shape adding a quarter-inch seam allowance all around. I don't cut it skinnier towards the points. 


With the freezer paper side up, use a small brush to apply liquid starch to the seam allowance all around the piece. Using an iron (I use my small Clover iron), work around the shape turning the seam allowance under.


 I do my points a bit differently as well. This is what works for me. I turn both edges of seam allowance under and that leaves a bit of a 'flag' sticking out by the point.

I fold this bit back, hold it with my fingernail and wet it again with a bit of starch then carefully apply heat with the little iron.


This folds the fabric under the point and gives a nice sharp point on the applique piece that doesn't fray out so easily. If the 'flag' is a bit large, I sometimes need to make a second fold... think of a little 'Z' in the fabric right under the point.


2. Applying the shapes to the background.

First, fold the background square in half and finger press a mark on both edges. I use these marks to center the fabric over my template so that everything will be centered  on the background. Use a water soluble marker and make a dot where each set of melons meets. This is for placement.

 Lay out the melons arranging until they look good. Slide each piece back a bit so that they are still in the correct orientation but away from the center of the block.


I use Roxanne's Glue Baste to attach the pieces to the background. I apply little dots to one whole side and just one at either end of the other side of the center pieces. Line the melons up with the dots made earlier and press in place.


Voilà - no pins required. Doing it this way allows me to stitch down the one side that is held in place, turn the corner and then remove the freezer paper. I then add a few drops of glue to the turned under edge to hold it in place after removing the paper. Let it dry a few minutes and finish stitching the final side. Because I am using all different colors, I change thread to match each melon color.


For the shapes on the outer edge of the circle, only put glue on the inner edge of the melon. I am leaving the freezer paper in the edge pieces until the blocks are joined to keep them stable.

I can lay out the blocks much faster and get more accurate placement using the glue over pins. Also, there are no pins to poke me or to loose in my chair... The added bonus is that the pieces can't shift while you are stitching so my point intersections are much better!

I have completed 8 blocks so far and have another 3 ready to stitch. I'm hoping that I will now be able to prepare and finish enough blocks for at least the first two rows of the quilt within the next week. Sounds like it should be doable...

Sunday, February 28, 2010

Sunday Stash Report

It has been a hard week for the stash. There has been a small amount going out but more coming in this week.

I have been working on getting petals prepared so I can continue to work on my Joseph's Coat project. I think I have finally mastered getting the points sharp with the freezer paper and starch. Now I just need to lay them all out and pin them to the background so I can continue to applique by hand.

I got a good deal on 3 charm packs. I figure that is about 2 meters of fabric. Please correct me if I'm way off.

I needed a border fabric to go on the Pink & Yellow quilt and wandered into the quilt store. I saw a fabric on the sale rack I felt would work well AND, it was 40% off!! I didn't have the quilt top with me because its still not all sewn together. I do have all of the blocks done though.. So, I took a chance that it would work and bought it.

After getting it home and looking at it with the blocks on the design wall, I am not so sure anymore. I probably should have waited until I had the top sewn together so I could take it along to audition borders with it. Oh well... I do really love the fabric.  If its not used for this particular quilt, it will get used at some point in time. I may even have to plan a quilt especially to use this print. Do you ever buy fabric because you think it will work for a project you are doing??

WEEK 9 STASH REPORT


Used this week: 2.4 M
Used Year to Date: 14 M
Added this week: 4.5 M
Added Year to Date: 7.9 M
Net used for 2010: 6.1 M

I'm loosing ground on my "net used" for the year so I need to get busy doing something! Don't forget to check out all the other reports on Judy's Blog

Friday, February 5, 2010

Update

Thought a post on the continuing saga of the Yellow & Pink Double Four Patch might be in order. There is not a lot to show but I have managed to sew a few of the blocks together again! Here is a shot of them on my design wall. I think I am going to like this "less scrappy" look better as the chains in the blocks will be more defined.
I have totally neglected my Joseph's Coat blocks. I have just 4 done so I have a loooong way to go yet. I need to take some time to prepare the applique pieces so I can easily pick up a block to work on in the evening while watching TV. I find the task of turning all those little seam allowances on the little melons quite arduous especially the points on the ends! Those points give me no end of trouble.

I'm still bogged down most of the time with year-end books. Its turning out to be a larger task than I had thought it would be.  I will be REALLY glad when this task is behind me so I can get back to doing some FUN things!

Thursday, November 19, 2009

Two blocks for Joseph's Coat


An update on my slow progress on my Joseph's Coat blocks. I have only completed two blocks so far. The first I did using the instructions as written by Kellie at Don't Look Now using glue stick to prepare the appliqué shapes. I think that perhaps my glue stick was old as it did not stick well. I found a newer one but I have found that the glue is still a bit sticky even after more than a week.


Since I was not able to find a local supplier of the Floriani Stitch and Wash Fusible nor a reasonably priced mail order source to Canada, I have had to resort to using freezer paper which I have in abundance. I decided to experiment with spray starch for prepping the shapes and found I liked it a bit better. I am able to get nice sharp points without any trouble.

Using freezer paper means that it must be removed at some point. I am stitching down one side of the 'petals' in the center of the block then removing the paper just prior to stitching the second side down. I took them out of the outer edge petals on the first block after stitching down the one side but soon discovered that they should be left in until after the blocks are joined as the outer edges have not stayed turned under. I was trying to make the block look nice to photograph and when I hit it with the iron, all those edges kinda got messed up. As a result of this lesson, the block on the left may not make the final cut unless I am able to do needle-turn on those edges. That will be determined when we get the block joining instructions.

Happy stitching!!

Monday, November 9, 2009

Here I go.. making adjustments to Joseph's Coat

I spent most of Sunday doing the prep work for Joseph's Coat but not without a few problems.

My first problem was my compass. It would only open to a maximum size of just over 4.5 inches and the instructions call for a compass set to 5.5 inches. I decided to just go with the 4.5 inches which should make my blocks for this quilt finish about 9 inches which I think (hope) will be ok.

When I began drawing the circles, I discovered that it made a difference in how I held my cheapo compass. The difference in the circles could be as much as 1/8 inch off. I used some tape to secure the shaft of my pencil to the arm of the compass to keep it from wiggling and managed to draw my basic pattern.

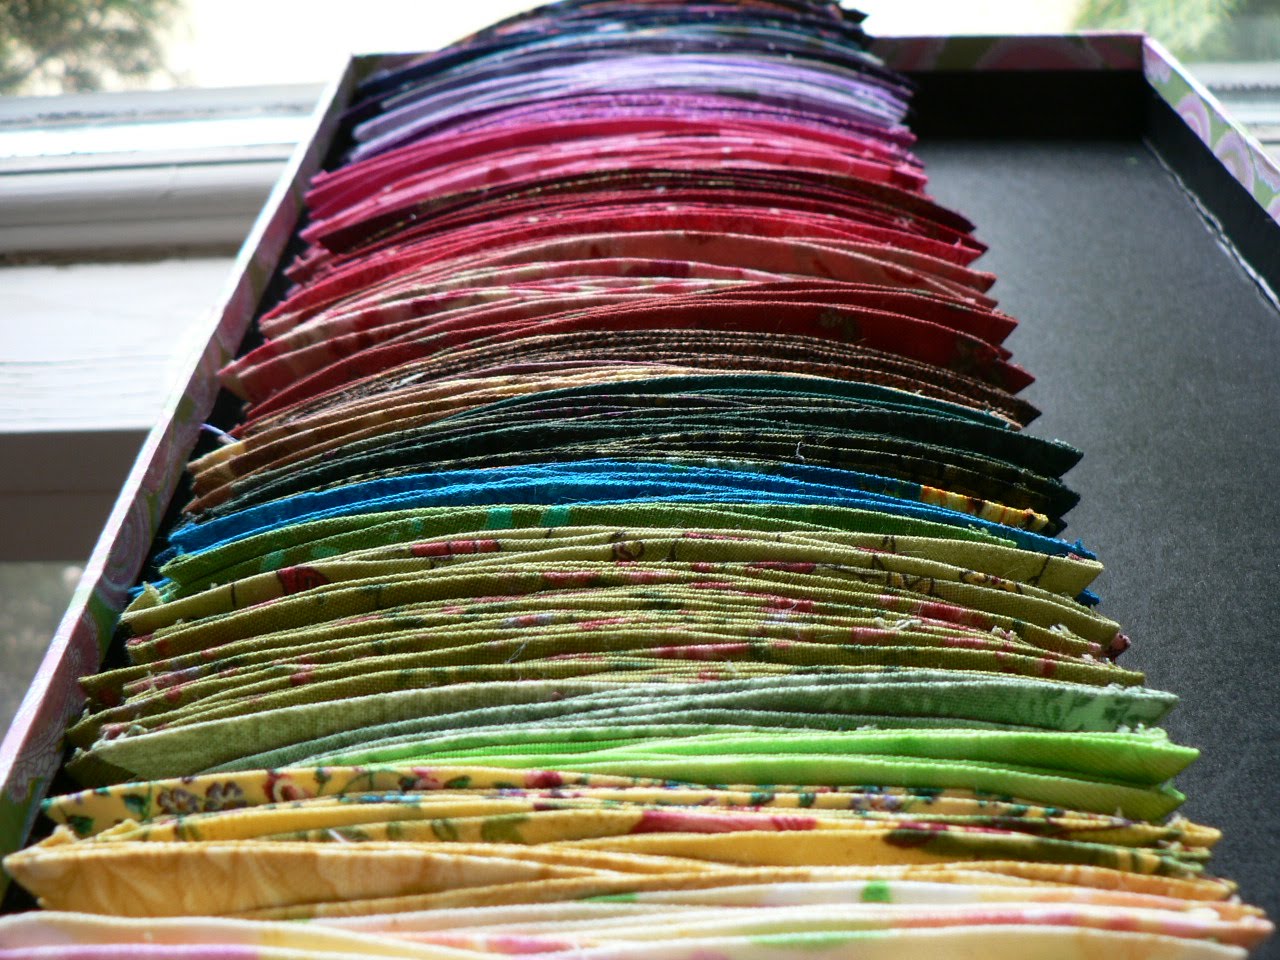
I created the template and drew some petal shapes onto freezer paper as I have plenty of it on hand. I did do a trick to make lots of petals at once. I layered more sheets of freezer paper underneath the top one with the drawn petals. Then, I put a staple into each petal to secure all the layers.

I also used my Clover mini iron to heat bond the layers together BETWEEN the petals. You have to be sure not to get the petals bonded or they won't come apart. (Lesson learned) I then rough cut rows of petal shapes and continued to staple the next rows until all were cut. I took these to my comfy chair and spent an hour watching quilt shows on video while I cut all the petals out.
Once all the petals were cut precisely, I removed the staples and separated them. (This is when I discovered that some of my stacks were accidentally welded together when I did the iron tacking trick.. so I lost a few.)I've decided to just use scraps for this project so I got out all my strips and ironed the freezer paper petal shapes onto the wrong sides. I cut out enough to make one block and proceeded to glue the edges. This is when I discovered that glue sticks can get old and become useless. The edges would not stick down. I went digging and found another glue stick and it worked better although those pointy ends are VERY fiddly and difficult to get precise. I found that it was a bit easier if I also used the Clover mini iron to heat set the glue especially on the points.  (I may experiment using spray starch to prep my petals to see if it works better for me.) I had 12 petals prepared and the whole day was gone. Next, I need to decide just how big I am going to make this so I can find some background fabric to use. Right now, I am thinking perhaps crib or lap size....